Repairing a Vintage Raketa Watch (2609A)
- May 17
- 6 min read
Updated: May 18
I've recently been venturing into watch repair and servicing after roughly 10 years of collecting and 3 years of watching people service and repair watches on YouTube. It's really good fun, but also incredibly difficult.
I keep an eye out for low price < £30 watches listed on eBay as non-runners, do a small amount of research into manufacturing scale, parts availability, and online resources, and then pull the trigger if it meets these criteria. The result this time, is a Raketa 2609A from sometime in the 1960-70s, listed as for repair but just about ticking over. The dial is unbranded, but has a really clean look with these unusual Arabic numerals at the 6 and 12 O'clock positions. The case is pretty beat up, but the back has an intriguing globe image with the word "SHOCKPROOF" engraved across it. I would later go on to dislike this word as it relates to the movement within this watch.
You can read more about this movement, and the normal 2609 variant at this great website.


What's wrong with it?
Well, several things. Firstly, I want to mention that if you're going to get into this hobby, you must use the eBay listings to your full advantage. The second trickiest part of this repair is hidden in plain sight in the above photo, and as I realised retrospectively, in the eBay listing photo too. Can you see it?

I got really lucky with this, considering I didn't notice it at first. Removing screws like this can be a messy, time consuming process with "alum", drilling the screw out, indenting a hole in the top, etc. There was just enough material protruding from the mainplate that I was able to get grip with some wire cutters and gently rotate the screw out. Ok, great. I got rid of the screw. Now how the hell do I find a replacement? Enter, eBay. Believe it or not, after sifting through this entire pack of soviet screws, only one of them was an exact match for what I required.

Bent Sweeping Seconds Pinion
I'm still not certain whether or not I caused this problem, but either way it was enough to convince me to buy a new tool. As a beginner, you're often taught to remove the cannon pinion (which is friction fit onto the movement) by grabbing either side of it between your tweezers, and pulling straight up. It's worked for me so far, but this movement was really dirty. I had to apply a lot of force. The result potentially, is this extremely thin pinion of the sweeping centre seconds wheel coming out bent during disassembly. Whether I caused it or not, I now own a dedicated cannon pinion removal tool that ensures the force is only applied in the correct direction.

Dirt, dirt, and more dirt!
As mentioned above, this is the oldest and dirtiest watch I've taken on so far (out of 4, at the time of writing). The inside of a watch must be pristine for it to function as intended, and this watch was far from it. Take a look at the following pictures to see what I mean.


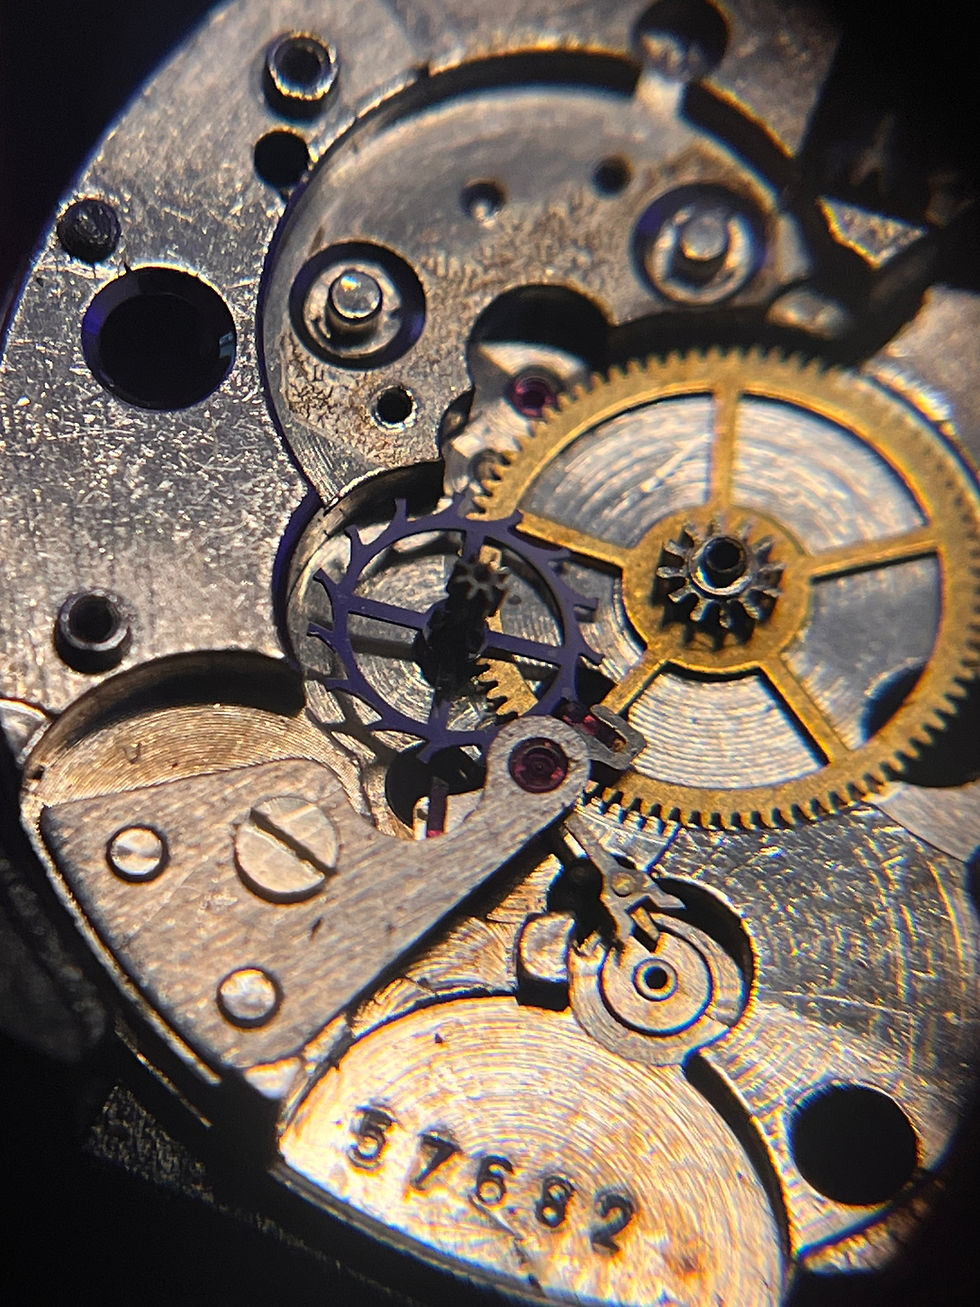


All in all, condition of the watch movement was not bad. It did try to run, but needed a deep clean, some new parts, and some fresh oils.
Here's how everything looked cleaned up and laid out in the sun.

Re-Assembly Gotchas
Comparing to the previous 3 movements I've worked on so far, this was quite difficult for me. It deviates from typical swiss setups in a few unusual ways, the keyless and motion works are quite unique, and there is an intermediate bridge or the centre wheel. As you see in the above pictures, the order of re-assembly is quite important too, I had to take the barrel bridge off several times during the rebuild. Lesson learned to always use my reference pictures, not try to rebuild based on my limited experience.
Remember that setting lever post from above? In my experience, they tend to go on the train wheel side of the movement before you put the barrel bridge on. In this case, it goes under the dial instead, and that went unnoticed for a while giving me winding issues. I only managed to figure this out thanks to my reference photos of the keyless works, and seeing that the setting lever spring was in fact in play with the post, and the way I'd originally inserted it meant that the post was not protruding.

As I mentioned in the introduction, the word "SHOCKPROOF" now causes me pain instead of intrigue. I'd just about become comfortable working on the Incabloc shock system, understanding how they work and how delicate they are, and performing several jewel clean and oil processes on my Seagull movement. This was a whole different beast. Whatever this shock system is, there is no hinge. The solid side of the spring is simply slid underneath the chaton and held in with force. I tried to lift it like a hinged spring, and it catapulted into a new universe.
After a break for my own sanity, 30 minutes of crawling across the floor with a flashlight, and a whole lot of frustration, I eventually found it on my mousepad in a section of matching colour. It took me about an hour to learn how this works and get it back in. I had to use two very fine oilers, one of them on the right side of the below picture pulling to the right, to keep the spring seated, whilst the left one worked on the two prongs in the left of the below image to wiggle them under the housing. I say the word pulling here, but I mean incredibly gently guiding. Absolute nightmare fuel. Something I'm more comfortable with now to try again in the future, but this was the single most tricky part of this entire project.

An unexpected encounter of the acrylic kind
This really threw me, and everything I thought I'd learned about watchmaking so far out the window. I'd assembled it, oiled it, wound it up. and it was beating away beautifully. I put the dial on, the hands on, the case back and the crystal and still it ran like a brand new watch. I took it over to my fiancee to show her the result and it had stopped. That's weird, let me take a look inside I said. Balance dead. I blow some air on it, it oscillates nicely but the escape wheel jumps back and forth between the same two teeth. WTF?
I tried everything, escapement system removed, train of wheels run freely. Ok, let me put it back in, case it up and try again, maybe something weird happened when I picked it up. Nope, same again. Escapement removed, train of wheels runs fine again. What is going on?
Well, here's a valuable lesson for you and I, the escape wheel moving back and forth between the same teeth in this case only happened when the watch crystal was on. I inspected the dial side really carefully, and the seconds hand was bent upward! The crystal was imparting a lot of friction to the seconds hand, and this was choking the entire movement. Remember that bent pinion from the sweeping seconds wheel? Maybe it wasn't me after all.
Anyway, some careful adjustment of the seconds hand and the case re-assembled, the watch is back up and running like it never had any issues. Overall, it didn't take me too long, the pivots are typically difficult to line up with the jewels in the train wheel bridge, and the gotchas mentioned above are likely one off lessons for this movement, if you're thinking of giving it a go. Parts have been quite easy to source along the way, without a hefty price tag.
The Finished Product
A nice military green strap and some Polywatch later;

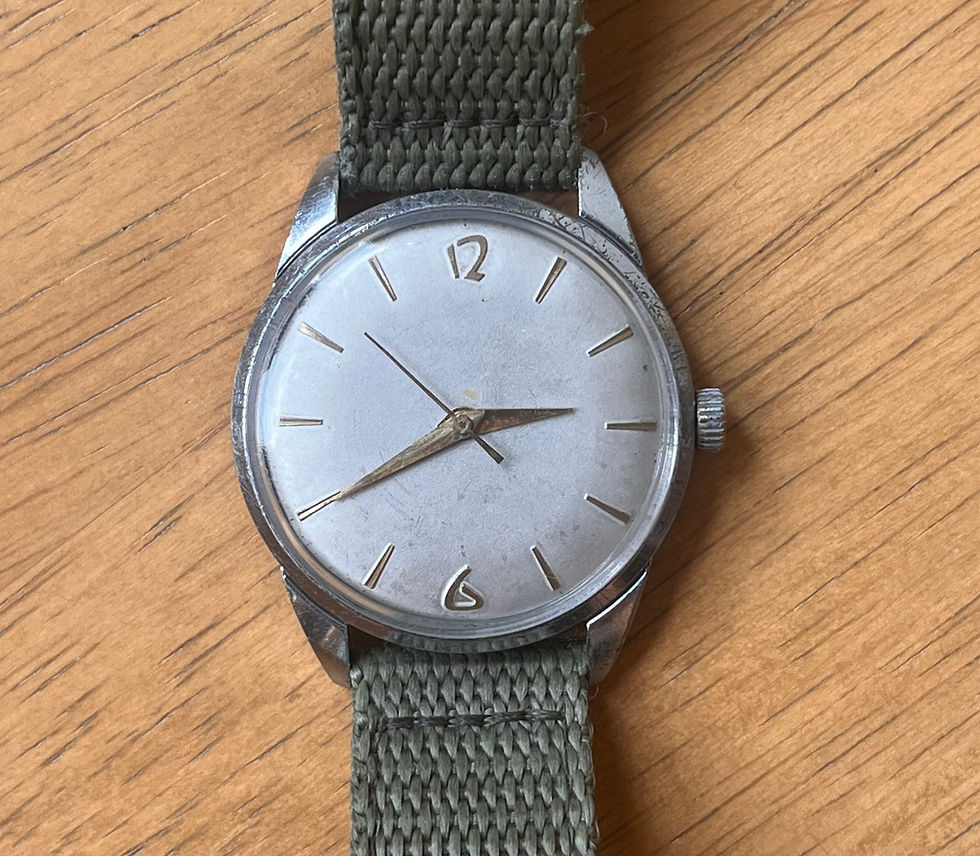
Thanks for reading!

Comments